Collapsible UICollectionView Sections

This post is brought to you by Clerk. Add secure, native iOS authentication in minutes with Clerk’s pre-built SwiftUI components.
let concatenatedThoughts = """
Welcome to Snips! Here, you'll find a short, fully code complete sample with two parts. The first is the entire code sample which you can copy and paste right into Xcode. The second is a step by step explanation. Enjoy!
"""
The Scenario
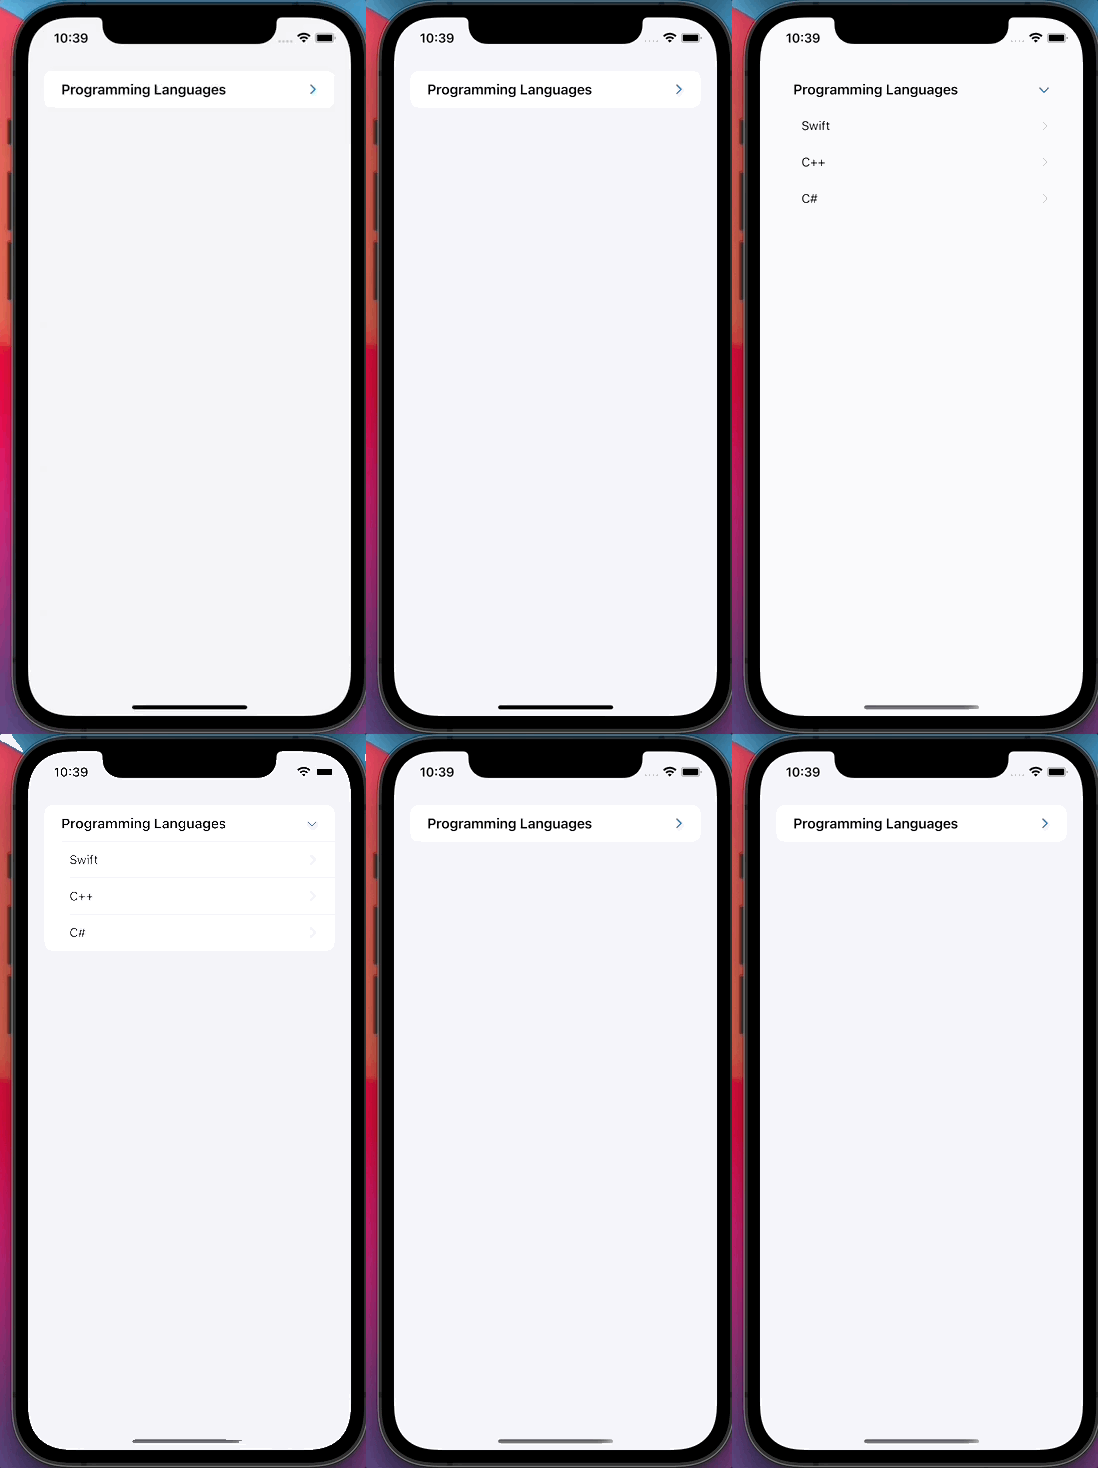
Create a basic UICollectionView with a collapsing section.
import UIKit

// 1
struct Item: Hashable {
    let id = UUID()
    let title: String
    let subItems: [Item]
}

// 2
typealias CollectionDataSource = UICollectionViewDiffableDataSource<Int, Item>

class CollapseViewController: UIViewController {

    private let data: [Item] = {
        return [Item(title: "Programming Languages", subItems: [Item(title: "Swift", subItems: []),
                                                                Item(title: "C++", subItems: []),
                                                                Item(title: "C#", subItems: [])])]
    }()

    private lazy var collectionView: UICollectionView = {
        let listConfiguration = UICollectionLayoutListConfiguration(appearance: .insetGrouped)
        let layout = UICollectionViewCompositionalLayout.list(using: listConfiguration)
        let collectionView = UICollectionView(frame: view.bounds, collectionViewLayout: layout)
        collectionView.autoresizingMask = [.flexibleHeight, .flexibleWidth]
        collectionView.backgroundColor = .systemGroupedBackground
        return collectionView
    }()

    lazy var datasource: CollectionDataSource = {
        // 3
        let parentItemCellRegistration = UICollectionView.CellRegistration<UICollectionViewListCell, Item> { cell, indexPath, model in
            var contentConfiguration = cell.defaultContentConfiguration()
            contentConfiguration.text = model.title
            contentConfiguration.textProperties.font = .preferredFont(forTextStyle: .headline)
            cell.contentConfiguration = contentConfiguration

            let disclosureOptions = UICellAccessory.OutlineDisclosureOptions(style: .header)
            cell.accessories = [.outlineDisclosure(options: disclosureOptions)]
        }

        let subItemsCellRegistration = UICollectionView.CellRegistration<UICollectionViewListCell, Item> { cell, indexPath, model in
            var contentConfiguration = cell.defaultContentConfiguration()
            contentConfiguration.text = model.title
            contentConfiguration.textProperties.font = .preferredFont(forTextStyle: .subheadline)
            contentConfiguration.textProperties.color = .label
            cell.contentConfiguration = contentConfiguration

            let disclosureOptions = UICellAccessory.disclosureIndicator()
            cell.accessories = [disclosureOptions]
        }

        let datasource = CollectionDataSource(collectionView: collectionView) { collectionView, indexPath, model in
            // 4
            let configType = model.subItems.isEmpty ? subItemsCellRegistration : parentItemCellRegistration

            return collectionView.dequeueConfiguredReusableCell(using: configType,
                                                                for: indexPath,
                                                                item: model)
        }

        return datasource
    }()

    override func viewDidLoad() {
        super.viewDidLoad()
        view.addSubview(collectionView)
        collectionView.frame = view.bounds

        // 5
        let firstParentItem = data.first!
        let subItems = data.first!.subItems

        // Create the datasource
        var snapshot = NSDiffableDataSourceSectionSnapshot<Item>()

        // Append the first section
        snapshot.append([firstParentItem], to: nil)

        // Populate that section
        snapshot.append(subItems, to: firstParentItem)

        // Apply
        datasource.apply(snapshot, to: 0)
    }
}
Which results in:

The Breakdown
Step 1
Create a data model that supports a parent-child relationship.
Step 2
This is a stylistic choice, but I typically typelias any diffable datasource for readability.
Step 3
Using modern cell registration APIs, we create two configurations:
- One for any top-level item
- One for any of the top-level item’s children
Step 4
Creating our diffable datasource, we check the model to determine if it’s a parent or a child. Depending on the result, we’ll return the correct cell configuration and create the cell.
Step 5
Finally, we use a section snapshot, NSDiffableDataSourceSectionSnapshot, and use its new function to append either a top-level item or children. If the parent parameter is nil, it’s treated as a top level item. If you do supply a parent, then those items will be inserted into that section.
Until next time ✌️